Application Load Balancer#
I know that it looks like we’re working on anything but ECS and containers at the moment, but I promise we’re getting closer. We just have to shave a few more yaks.
Now it’s time to start listening for traffic. To do that, we’ll set up a Load Balancer and a Listener.
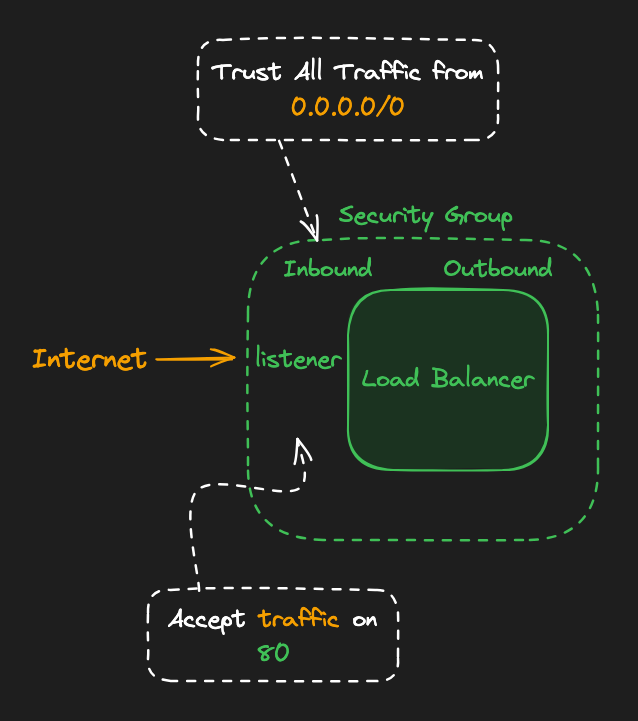
A load balancer sits in front of our service and distributes incoming traffic across your task(s). It handles things like health checks, SSL termination, and routing traffic to healthy containers. We’ll place the load balancer in public subnets so it can receive traffic from the internet.
To make this work, we need several pieces:
- Load Balancer: The actual ALB that receives traffic
- Listener: Rules that tell the load balancer what to do with incoming traffic
- Target Group: These tell the Listener where to send that traffic (more on this next lesson).
Assignment#
Create an Application Load Balancer named patientping-alb with a listener that returns a static response.
Cost check: This is the part that will cost money. An ALB costs about $0.0225 per hour (~$16/mo) plus data transfer costs. This is an important part to tear down when we tell you to.
Create the ALB from the console:
- In the AWS Console, navigate to
EC2, then openLoad BalancersunderLoad Balancing. - Click Create load balancer and choose Application Load Balancer.
- Name it
patientping-alb. - Set the Scheme to Internet-facing and IP address type to IPv4.
- Under Network mapping, select your
patientpingVPC and choose both public subnets (patientping-public-aandpatientping-public-b) in the appropriate availability zones. - Under Security groups, switch to the
patientping-externalsecurity group. - Under Listeners and routing, keep a single HTTP listener on port
80. For now, set the Default action to Return fixed response, with:- Status code:
200 - Content type:
text/plain - Response body:
Load balancer is working!
- Status code:
- All other defaults are fine, scroll to the bottom and click Create load balancer and wait for its state to become active.
- In the AWS Console, navigate to
Grab the “DNS name” from the load balancer’s page. Once the ALB is active (no longer “provisioning”), visit
http://<DNS name>in your browser.We’ve only configured an HTTP listener, so include the
http://prefix. You should see the message “Load balancer is working!”